In this chapter, we will learn how to use OpenCV to capture frames using the system camera. The VideoCapture class of the org.opencv.videoio package contains classes and methods to capture video using the camera. Let’s go step by step and learn how to capture frames −
Step 1: Load the OpenCV native library
While writing Java code using OpenCV library, the first step you need to do is to load the native library of OpenCV using the loadLibrary(). Load the OpenCV native library as shown below.
// Loading the core library
System.loadLibrary(Core.NATIVE_LIBRARY_NAME);
Step 2: Instantiate the video capture class
Instantiate the Mat class using any of the functions mentioned in this tutorial earlier.
// Instantiating the VideoCapture class (camera:: 0)
VideoCapture capture = new VideoCapture(0);
Step 3: Read the frames
You can read the frames from the camera using the read() method of the VideoCapture class. This method accepts an object of the class Mat to store the frame read.
// Reading the next video frame from the camera
Mat matrix = new Mat();
capture.read(matrix);
Example
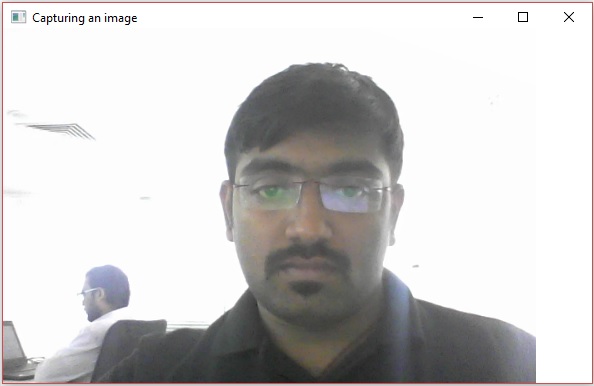
The following program demonstrates how to capture a frame using camera and display it using JavaFX window. It also saves the captured frame.
import java.awt.image.BufferedImage;
import java.awt.image.DataBufferByte;
import java.awt.image.WritableRaster;

import java.io.FileNotFoundException;
import java.io.IOException;

import javafx.application.Application;
import javafx.embed.swing.SwingFXUtils;
import javafx.scene.Group;
import javafx.scene.Scene;
import javafx.scene.image.ImageView;
import javafx.scene.image.WritableImage;
import javafx.stage.Stage;

import org.opencv.core.Core;
import org.opencv.core.Mat;
import org.opencv.imgcodecs.Imgcodecs;
import org.opencv.videoio.VideoCapture;

public class CameraSnapshotJavaFX extends Application {
   Mat matrix = null;

   @Override
   public void start(Stage stage) throws FileNotFoundException, IOException {
      // Capturing the snapshot from the camera
      CameraSnapshotJavaFX obj = new CameraSnapshotJavaFX();
      WritableImage writableImage = obj.capureSnapShot();

      // Saving the image
      obj.saveImage();

      // Setting the image view
      ImageView imageView = new ImageView(writableImage);

      // setting the fit height and width of the image view
      imageView.setFitHeight(400);
      imageView.setFitWidth(600);

      // Setting the preserve ratio of the image view
      imageView.setPreserveRatio(true);

      // Creating a Group object
      Group root = new Group(imageView);

      // Creating a scene object
      Scene scene = new Scene(root, 600, 400);

      // Setting title to the Stage
      stage.setTitle("Capturing an image");

      // Adding scene to the stage
      stage.setScene(scene);

      // Displaying the contents of the stage
      stage.show();
   }
   public WritableImage capureSnapShot() {
      WritableImage WritableImage = null;

      // Loading the OpenCV core library
      System.loadLibrary( Core.NATIVE_LIBRARY_NAME );

      // Instantiating the VideoCapture class (camera:: 0)
      VideoCapture capture = new VideoCapture(0);

      // Reading the next video frame from the camera
      Mat matrix = new Mat();
      capture.read(matrix);

      // If camera is opened
      if( capture.isOpened()) {
         // If there is next video frame
         if (capture.read(matrix)) {
            // Creating BuffredImage from the matrix
            BufferedImage image = new BufferedImage(matrix.width(),
               matrix.height(), BufferedImage.TYPE_3BYTE_BGR);

            WritableRaster raster = image.getRaster();
            DataBufferByte dataBuffer = (DataBufferByte) raster.getDataBuffer();
            byte[] data = dataBuffer.getData();
            matrix.get(0, 0, data);
            this.matrix = matrix;

            // Creating the Writable Image
            WritableImage = SwingFXUtils.toFXImage(image, null);
         }
      }
      return WritableImage;
   }
   public void saveImage() {
      // Saving the Image
      String file = "E:/OpenCV/chap22/sanpshot.jpg";

      // Instantiating the imgcodecs class
      Imgcodecs imageCodecs = new Imgcodecs();

      // Saving it again
      imageCodecs.imwrite(file, matrix);
   }
   public static void main(String args[]) {
      launch(args);
   }
}
Output
On executing the program, you will get the following output.

If you open the specified path, you can observe the same frame which is saved as a jpg file.
Learning working make money