Plotly in Python is commonly referred to as “plotly.py”. It is a free and open-source plotting library built on top of “plotly.js”. Plotly.py provides a rich set of features and supports more than 40 unique chart types. It is widely used for financial analysis, geographical mapping, scientific visualization, 3D plotting, and data analysis applications.
It offers an interactive interface that allows users to explore and interact with data visualizations. It provides functionalities like zooming, panning, tooltips, and hover effects, making it easy to analyse and understand complex datasets.
Scikit Image Using Plotly
Plotly.py can be used along with the scikit-image library to achieve various data visualization tasks related to image processing. To set up plotly, you need to ensure that the library is installed and properly configured.
Installing plotly using pip
Execute the below commands in the command prompt to install the plotly module. It is an easy way to install the latest package of Plotly from PyPi.
pip install plotly
Installing plotly using conda
If you”re using the Anaconda distribution already in your system, then you can directly use the conda package manager to install plotly.
conda install -c plotly plotly
Once Plotly is installed, you can import it into your Python scripts or interactive sessions using the following statement −
import plotly
This imports the necessary modules from Plotly to create interactive and customizable visualizations. Below are a few basic Python programs that demonstrate how to use the Plotly along with scikit-image to perform data visualization in image processing tasks effectively.
Example 1
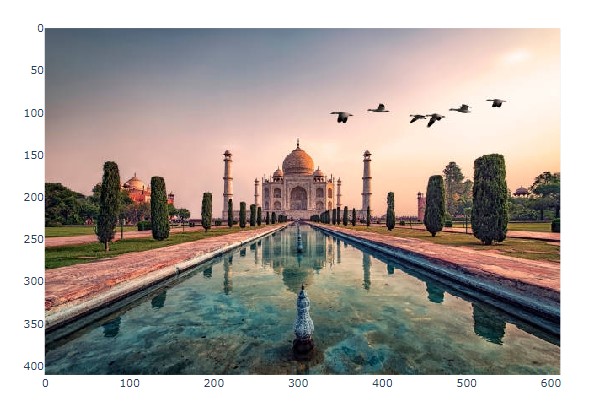
The following example displays an RBG image using the Plotly.express.imshow() method.
import plotly.express as px
from skimage import io

# Read an image
image = io.imread(''Images/Tajmahal.jpg'')
# Display the image using Plotly
fig = px.imshow(image)
fig.show()
Output
On executing the above program, you will get the following output −

Example 2
The following example demonstrates how to apply a circular mask to an image using scikit-image and display the original image and the masked image side by side using Plotly.
import matplotlib.pyplot as plt
from skimage import io
import numpy as np

# Load the image
image_path = ''Images_/Zoo.jpg''
image = io.imread(image_path)
image_copy = np.copy(image)

# Create circular mask
rows, cols, _ = image.shape
row, col = np.ogrid[:rows, :cols]
center_row, center_col = rows / 2, cols / 2
radius = min(rows, cols) / 2
outer_disk_mask = ((row - center_row)**2 + (col - center_col)**2 > radius**2)

# Apply mask to image
image[outer_disk_mask] = 0

# Display the original and masked images using Matplotlib
fig, axes = plt.subplots(nrows=1, ncols=2, figsize=(10, 5))
axes[0].imshow(image_copy)
axes[0].set_title(''Original Image'')
axes[0].axis(''off'')
axes[1].imshow(image)
axes[1].set_title(''Masked Image'')
axes[1].axis(''off'')
plt.tight_layout()
plt.show()
Output
