Overlaying an image refers to placing one image on top of another image. It involves combining the pixel values of the two images to create a composite image.
When overlaying an image, the top image is placed on the background image, allowing the pixels of the top image to partially or completely cover the pixels of the background image.
This can be done with varying degrees of transparency, allowing the background image to show through to some extent.
Overlaying Image in Mahotas
We can overlay an image in mahotas using the overlay() function. This function ensures that the overlay image is aligned with the base image, taking into account their dimensions and pixel values.
It automatically handles resizing or cropping the overlay image to match the size of the base image if necessary.
To overlay an image in mahotas, we need to define the transparency or alpha value for the overlay image. This value determines how much the overlay image will cover the background image.
The mahotas.overlay() function
In mahotas we use mahotas.overlay() function to overlay an image. This function accepts a single channel image as an input and returns a resulting overlayed image.
The mahotas.overlay() function selects the maximum pixel value for each pixel location, effectively combining the visual content of both images.
This operation is particularly useful when the overlay image has transparency information (e.g., an alpha channel), as it allows the transparent parts of the overlay image to reveal the content of the base image.
Syntax
Following is the basic syntax of overlay() function in mahotas −
mahotas.overlay(gray, red=None, green=None, blue=None, if_gray_dtype_not_uint8= ''stretch'')
Parameters
Following are the parameters accepted by the overlay() function in mahotas −
-
gray − It is the grayscale image onto which the color channels will be superimposed. It acts as the canvas for overlaying.
-
red, blue , green (optional) − These represents the individual color channels that will be overlayed on the grayscale image. They can be provided as separate arrays representing the intensity of each color channel.
If any of these color channels are not specified (set to None), the resulting overlay image will only contain the grayscale information.
-
if_gray_dtype_not_uint8 (optional) − It defines what to do if the input image is not of data type ”np.uint8”. Default is stretch.
Example
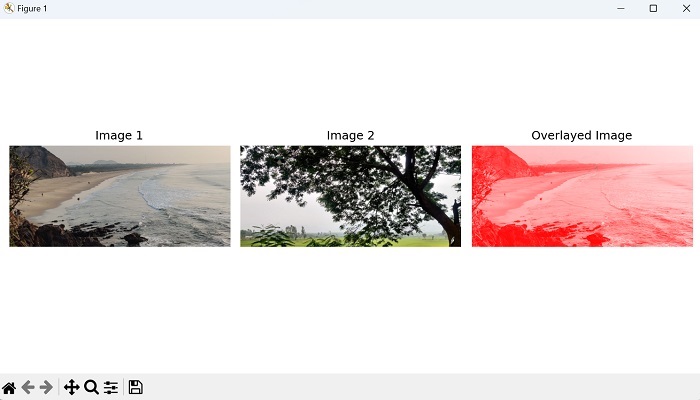
In the following example, we are trying to overlay an image with a binary mask (pixel values are either 0 (background) or 1 (foreground) −
import numpy as np
import mahotas as mh
import matplotlib.pyplot as plt
# Load the images
image1 = mh.imread(''sea.bmp'')
image2 = mh.imread(''tree.tiff'')
image = mh.imread(''sea.bmp'', as_grey=True)
# foreground image
mask = mh.imread(''tree.tiff'', as_grey=True) > 0
overlay = mh.overlay(image, mask)
# Display all three images in one plot
plt.figure(figsize=(10, 5))
# Display image1
plt.subplot(1, 3, 1)
plt.imshow(image1)
plt.title(''Image 1'')
plt.axis(''off'')
# Display image2
plt.subplot(1, 3, 2)
plt.imshow(image2)
plt.title(''Image 2'')
plt.axis(''off'')
# Display the overlayed image
plt.subplot(1, 3, 3)
plt.imshow(overlay, cmap=''gray'')
plt.title(''Overlayed Image'')
plt.axis(''off'')
plt.tight_layout()
plt.show()
Output
The output obtained is as shown below −

Overlaying a Transparent Image on another Image
To overlay a transparent image on another image, we create a transparent overlay by creating an alpha channel, which determines the transparency of each pixel. We initialize an array of zeros with the same shape as the background image, representing the alpha channel.
We set the transparency value as greater than 0 for pixels in the overlay image that are non−zero.
Now, we can overlay the images by combining the background image, overlay image, and alpha channel.
We multiply the background image by (1 − alpha) to reduce its intensity where the overlay image is present, and multiply the overlay image by the alpha channel to control its transparency. Finally, we add the two components together.
Example
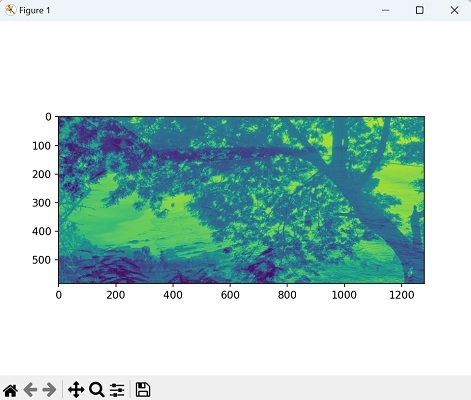
Here, we are trying to overlay a transparent image on another image −
import numpy as np
import mahotas as mh
from pylab import imshow, show
# Load the images
image = mh.imread(''tree.tiff'', as_grey=True)
overlay = mh.imread(''sea.bmp'', as_grey=True)
# Create a transparent overlay
alpha = np.zeros(image.shape)
alpha[overlay > 0] = 0.5 # Set transparency value for non-zero pixels in
overlay
# Overlay the images
result = mh.stretch(mh.stretch(image) * (1 - alpha) + overlay * alpha)
# Display the result
imshow(result)
show()
Output
Output of the above code is as follows −

Overlaying an Image with a specified Transparency Level
To overlay an image with a specified transparency level we need to first define the transparency level for the overlay image we desire.
The transparency level is a value between 0.0 (fully transparent) and 1.0 (fully opaque). This value determines the blending ratio between the background image and the overlay image.
Then using alpha blending, we can merge the images together based on the defined transparency level. Then we need to adjust the background image intensity by reducing the intensity of the background image in regions where the overlay image is present.
To achieve this, we multiply the background image by (1 − alpha). We then control the transparency of the overlay image by multiplying it with the alpha value.
The adjusted background image and the overlay image with controlled transparency are then added together to create the final overlayed image.
Example
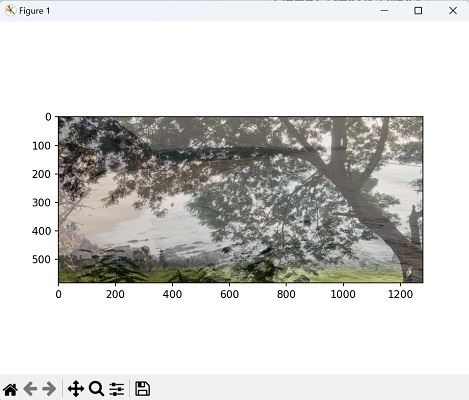
Now, we are trying to overlay an image with a specified transparency level −
import numpy as np
import mahotas as mh
from pylab import imshow, show
# Load the images
image = mh.imread(''tree.tiff'')
overlay = mh.imread(''sea.bmp'')
# Define the transparency level
alpha = 0.5
# Blend the images using alpha blending and transparency level
result = mh.stretch(mh.stretch(image) * (1 - alpha) + overlay * alpha)
# Display the result
imshow(result)
show()
Output
Following is the output of the above code −
