Image labeling is a data labeling process that involves identifying specific features or objects in an image, adding meaningful information to select and classify those objects.
- It is commonly used to generate training data for machine learning models, particularly in the field of computer vision.
- Image labeling is used in a wide range of applications, including object detection, image classification, scene understanding, autonomous driving, medical imaging, and more.
- It allows machine learning algorithms to learn from labeled data and make accurate predictions or identifications based on the provided annotations.
Functions for Labeling Images
Following are the different functions used to label images in mahotas −
| S.No | Function & Description |
|---|---|
| 1 | label()
This function performs connected component labeling on a binary image, |
| 2 | labeled.label()
This function assigns consecutive labels starting from 1 to different regions of an image. |
| 3 | labeled.filter_labeled()
This function applies filters to the selected regions of an image while leaving other regions unchanged. |
Now, lets us see examples of some of these functions.
The label() Function
The mahotas.label() function is used to label the array, which is interpreted as a binary array. This is also known as connected component labeled, where the connectivity is defined by the structuring element.
Example
Following is the basic example to label an image using the label() function −
import mahotas as mh
import numpy as np
from pylab import imshow, show
# Create a binary image
image = np.array([[0, 0, 1, 1, 0],
[0, 1, 1, 0, 0],
[0, 0, 0, 1, 1],
[0, 0, 0, 0, 1],
[0, 1, 1, 1, 1]], dtype=np.uint8)
# Perform connected component labeling
labeled_image, num_labels = mh.label(image)
# Print the labeled image and number of labels
print("Labeled Image:")
print(labeled_image)
print("Number of labels:", num_labels)
imshow(labeled_image)
show()
Output
After executing the above code, we get the following output −
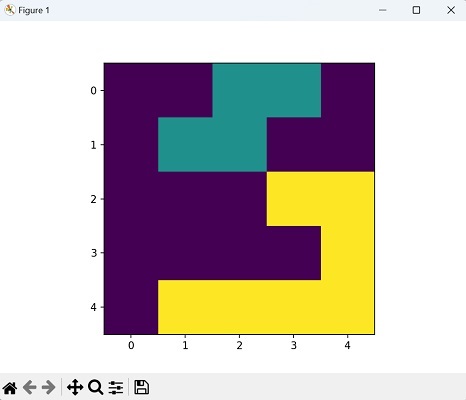
Labeled Image:
[[0 0 1 1 0]
[0 1 1 0 0]
[0 0 0 2 2]
[0 0 0 0 2]
[0 2 2 2 2]]
Number of labels: 2
The image obtained is as shown below −

The labeled.label() Function
The mahotas.labeled.label() function is used to update the label values to be in sequential order. The resulting sequential labels will be a new labeled image with labels assigned consecutively starting from 1.
In this example, we start with a labeled image represented by a NumPy array where the labels are non−sequential.
Example
Following is the basic example to label an image using the labeled.label() function −
import mahotas as mh
import numpy as np
from pylab import imshow, show
# Create a labeled image with non-sequential labels
labeled_image = np.array([[0, 0, 1, 1, 0],
[0, 2, 2, 0, 0],
[0, 0, 0, 3, 3],
[0, 0, 0, 0, 4],
[0, 5, 5, 5, 5]], dtype=np.uint8)
# Update label values to be sequential
sequential_labels, num_labels = mh.labeled.label(labeled_image)
# Print the updated labeled image
print("Sequential Labels:")
print(sequential_labels)
imshow(sequential_labels)
show()
Output
The output obtained is as follows −
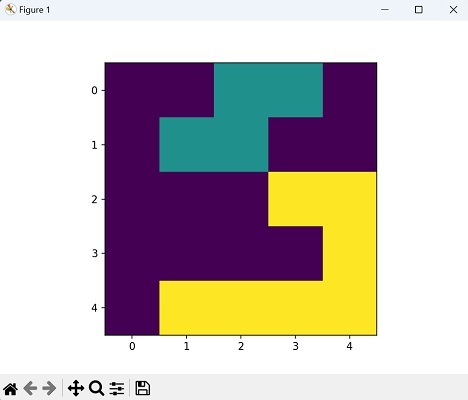
Sequential Labels:
[[0 0 1 1 0]
[0 1 1 0 0]
[0 0 0 2 2]
[0 0 0 0 2]
[0 2 2 2 2]]
Following is the image produced −

We have discussed these functions in detail in the remaining chapters of this section.