The Hit & Miss transform is a binary that detects specific patterns = or shapes within an image.
The operation compares a structuring element with the input binary image. The structuring element consists of foreground (1) and background (0) pixels arranged in a specific pattern that represents the desired shape or pattern to be detected.
The Hit−or−Miss Transform performs a pixel−wise logical AND operation between the structuring element and the image, and then checks if the result matches a pre−defined condition.
The condition specifies the exact arrangement of foreground and background pixels that should be present in the matched pattern. If the condition is satisfied, the output pixel is set to 1, indicating a match; otherwise, it is set to 0.
Hit & Miss transform in Mahotas
In Mahotas, we can use the mahotas.hitmiss() function to perform Hit & Miss transformation on an image. The function uses a structuring element ”Bc” to determine whether a specific pattern exists in the input image.
The structuring element in Mahotas can take on three values: 0, 1, or 2. A value of 1 indicates the foreground of the structuring element, while 0 represents the background.
The value 2 is used as a “don”t care” value, meaning that a match should not be performed for that particular pixel.
To identify a match, the structuring element”s values must overlap with the corresponding pixel values in the input image.
If the overlap satisfies the conditions specified by the structuring element, the pixel is considered a match.
The mahotas.hitmiss() function
The mahotas.hitmiss() takes a grayscale image as an input and returns a binary image as output. The white pixels represent areas where there is a match between the structuring element and the input image, while the black pixels represent areas where there is no match.
Syntax
Following is the basic syntax of the hitmiss() function in mahotas −
mahotas.hitmiss(input, Bc, out=np.zeros_like(input))
Where,
-
input − It is the input grayscale image.
-
Bc − It is the pattern that needs to be matched in the input image. It can have a value of 0, 1, or 2.
-
out (optional) − It defines in which array to store the output image (default is of same size as input).
Example
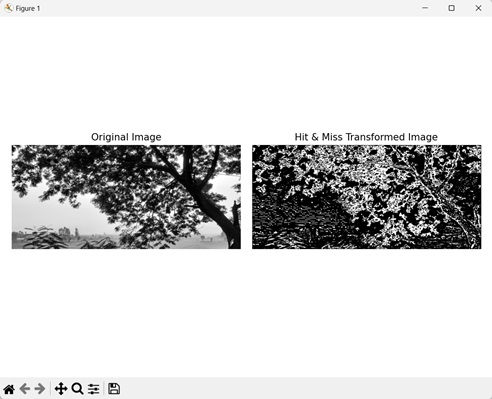
The following example shows hit & miss transformation on an image using the mh.hitmiss() function.
import mahotas as mh
import numpy as np
import matplotlib.pyplot as mtplt
# Loading the image
image = mh.imread(''tree.tiff'')
# Converting it to grayscale
image = mh.colors.rgb2gray(image)
# Applying thresholding
threshold_image = mh.thresholding.bernsen(image, 5, 200)
# Creating hit & miss template
template = np.array([[1, 2, 1, 2, 1],[2, 1, 1, 1, 2],[2, 2, 1, 2, 2]])
# Applying hit & miss transformation
hit_miss = mh.hitmiss(threshold_image, template)
# Creating a figure and axes for subplots
fig, axes = mtplt.subplots(1, 2)
# Displaying the original image
axes[0].imshow(image, cmap=''gray'')
axes[0].set_title(''Original Image'')
axes[0].set_axis_off()
# Displaying the hit & miss transformed image
axes[1].imshow(hit_miss, cmap=''gray'')
axes[1].set_title(''Hit & Miss Transformed Image'')
axes[1].set_axis_off()
# Adjusting spacing between subplots
mtplt.tight_layout()
# Showing the figures
mtplt.show()
Output
Following is the output of the above code −

By Detecting Edges
We can also detect edges of an image by applying the Hit & Miss transformation. The edges represent the boundary between different regions in an image.
These are areas where the difference in intensity value between the neighboring pixels is high.
In mahotas, to detect edges using Hit & Miss transform, we first create a structuring element. This structuring element matches the edges of the template with the input image.
We then perform on the image and then pass the structuring element as the Bc parameter to the hitmiss() function.
For example, the following structuring element can be used to detect edges in an input image −
[[1, 2, 1]
 [2, 2, 2]
 [1, 2, 1]]
In here, the 1s are present at the top−rightmost, top−leftmost, bottom−rightmost, and bottom−leftmost positions of the structuring element. The edges are usually present at these locations in an image.
The 1s present in the structuring element matches with the pixels having intensity value 1 in the image, thus highlighting the edges as the foreground.
Example
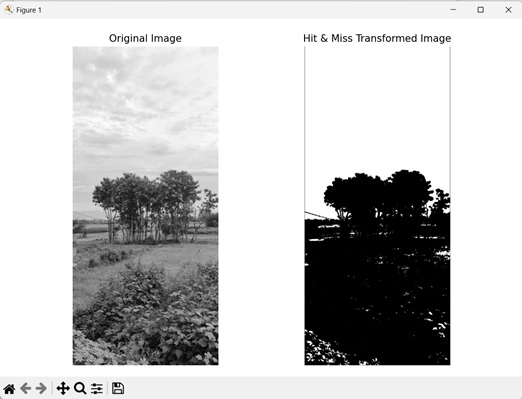
In this example, we are trying to detect edges of an image by applying the Hit & Miss transformation −
import mahotas as mh
import numpy as np
import matplotlib.pyplot as mtplt
# Loading the image
image = mh.imread(''nature.jpeg'')
# Converting it to grayscale
image = mh.colors.rgb2gray(image).astype(np.uint8)
# Applying thresholding
threshold_value = mh.thresholding.rc(image)
threshold_image = image > threshold_value
# Creating hit & miss template
template = np.array([[1, 2, 1],[2, 2, 2],[1, 2, 1]])
# Applying hit & miss transformation
hit_miss = mh.hitmiss(threshold_image, template)
# Creating a figure and axes for subplots
fig, axes = mtplt.subplots(1, 2)
# Displaying the original image
axes[0].imshow(image, cmap=''gray'')
axes[0].set_title(''Original Image'')
axes[0].set_axis_off()
# Displaying the hit & miss transformed image
axes[1].imshow(hit_miss, cmap=''gray'')
axes[1].set_title(''Hit & Miss Transformed Image'')
axes[1].set_axis_off()
# Adjusting spacing between subplots
mtplt.tight_layout()
# Showing the figures
mtplt.show()
Output
Output of the above code is as follows −

By Detecting Diagonals
We can use the Hit & Miss transformation to detect the diagonals of an image as well. Diagonals are indicated by a linear pattern connecting opposite corners of an image.
These are the region where the pixel intensity changes along a diagonal path.
In mahotas, we first perform on the input image. We then pass a structuring element as the Bc parameter to the hitmiss() function. This structuring element matches the diagonals of the template with the diagonals of the input image.
For example, the following structuring element can be used to detect diagonals in an input image −
[[0, 2, 0]
 [2, 0, 2]
 [0, 2, 0]]
In here, the 0s run along a diagonal path from the top leftmost to the bottom rightmost position, and from the top rightmost to the bottom leftmost position. The diagonals are usually present at these locations in an image.
The 0s present in the structuring element matches with the pixels having intensity value 0 in the image, thus highlighting the diagonals as the background.
Example
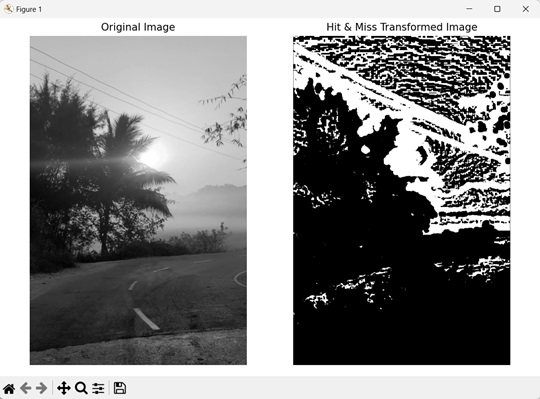
Here, we are trying to detect the diagonals of an image using the Hit & Miss transformation −
import mahotas as mh
import numpy as np
import matplotlib.pyplot as mtplt
# Loading the image
image = mh.imread(''sun.png'')
# Converting it to grayscale
image = mh.colors.rgb2gray(image)
# Applying thresholding
threshold_image = mh.thresholding.bernsen(image, 10, 10)
# Creating hit & miss template
template = np.array([[0, 2, 0],[2, 0, 2],[0, 2, 0]])
# Applying hit & miss transformation
hit_miss = mh.hitmiss(threshold_image, template)
# Creating a figure and axes for subplots
fig, axes = mtplt.subplots(1, 2)
# Displaying the original image
axes[0].imshow(image, cmap=''gray'')
axes[0].set_title(''Original Image'')
axes[0].set_axis_off()
# Displaying the hit & miss transformed image
axes[1].imshow(hit_miss, cmap=''gray'')
axes[1].set_title(''Hit & Miss Transformed Image'')
axes[1].set_axis_off()
# Adjusting spacing between subplots
mtplt.tight_layout()
# Showing the figures
mtplt.show()
Output
After executing the above code, we get the following output −
