Image stretching is a technique of enhancing the contrast of an image by mapping the original pixel values to a new range of values. This is generally done to improve the visibility of details and enhance the overall appearance of the image.
In the case of RGB images, each pixel has three color channels− red, green, and blue.
Stretching the RGB image involves independently stretching the values of each color channel to expand the range of intensities.
Image Stretch RGB in Mahotas
In Mahotas, RGB image stretching is performed by stretching the individual color channels (Red, Green, and Blue) of the image. The stretching process involves mapping the original pixel intensities to a new range to increase the contrast.
After stretching the individual RGB channels, they need to be combined back to create the final stretched image.
We can perform image stretching RGB in mahotas using the stretch() function and the stretch_rgb() function.
Using the stretch() and the stretch_rgb() Functions
The mahotas.stretch() and mahotas.stretch_rgb() functions stretches the pixel values in each channel of the RGB image between the specified min_value and max_value.
Pixels with values below min_value will be set to min_value, and pixels with values above max_value will be set to max_value. The stretching is performed independently on each channel.
Syntax
Following is the basic syntax for mahotas.stretch() function −
mahotas.stretch(img,arg0=None, arg1=None, dtype=<type ''numpy.uint8''>)
Following is the basic syntax of mahotas.stretch_rgb() function −
mahotas.stretch(img,arg0=None, arg1=None, dtype=<type ''numpy.uint8''>)
Parameters
Following are the parameters passed to the mahotas.stretch() function −
img − It is the input image.
arg0 and arg1 (optional) − These parameters specify the range within which the pixel values should be stretched. The interpretation of these arguments depends on their values −
-
If both arg0 and arg1 are provided and are not None, they represent the minimum and maximum values that the pixel values should be stretched to. The pixel values below arg0 will be set to arg0, and pixel values above arg1 will be set to arg1.
-
If only arg0 is provided and arg1 is None, arg0 should be a tuple or list of length 2 representing the percentile values. The pixel values below the value at the first element of arg0 will be set to that value, and pixel values above the value at the second element of arg0 will be set to that value.
-
If both arg0 and arg1 are None, the pixel values will be stretched to the full range of the data type specified by the dtype parameter (default is numpy.uint8).
dtype − It specifies the data type of the output image. The default value is numpy.uint8, which represents an unsigned 8-bit integer.
Example
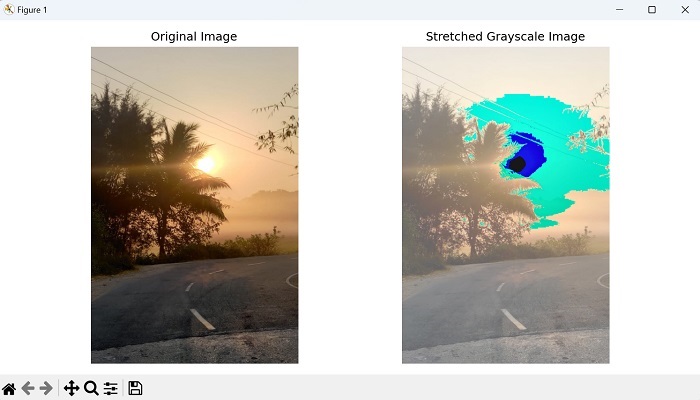
In the following example, we are using the mahotas.stretch() function to stretch the image−
import mahotas as mh
import numpy as np
import matplotlib.pyplot as plt
image = mh.imread(''sun.png'')
# Stretch image
stretched = mh.stretch(image, arg0=100, arg1=280)
# Create a figure with subplots
fig, axes = plt.subplots(1, 2, figsize=(10, 5))
# Display the original image
axes[0].imshow(image)
axes[0].set_title(''Original Image'')
axes[0].axis(''off'')
# Display the stretched grayscale image
axes[1].imshow(stretched, cmap=''gray'')
axes[1].set_title(''Stretched Grayscale Image'')
axes[1].axis(''off'')
# Adjust the layout and display the plot
plt.tight_layout()
plt.show()
Output
Following is the output of the above code −

Example
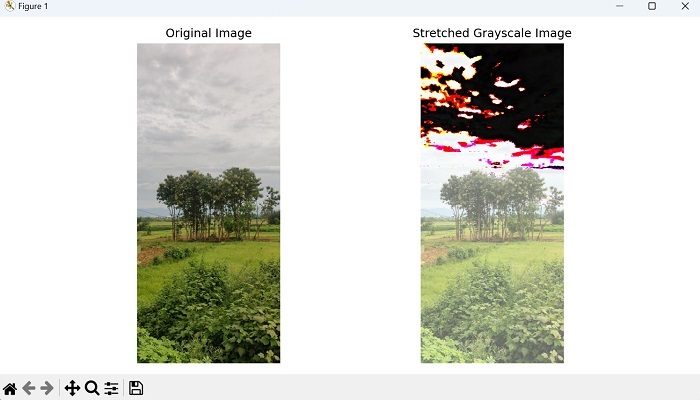
In this example, we will see how to use mahotas.stretch_rgb function to stretch an image −
import mahotas as mh
import numpy as np
import matplotlib.pyplot as plt
image = mh.imread(''nature.jpeg'')
# Stretch image
stretched = mh.stretch_rgb(image, arg0=100, arg1=280)
# Create a figure with subplots
fig, axes = plt.subplots(1, 2, figsize=(10, 5))
# Display the original image
axes[0].imshow(image)
axes[0].set_title(''Original Image'')
axes[0].axis(''off'')
# Display the stretched grayscale image
axes[1].imshow(stretched, cmap=''gray'')
axes[1].set_title(''Stretched Grayscale Image'')
axes[1].axis(''off'')
# Adjust the layout and display the plot
plt.tight_layout()
plt.show()
Output
Following is the output of the above code −

Stretching Image with Percentile Value
To stretch an RGB image with percentile values in Mahotas, we can manually calculate the percentiles and use the stretch function individually on each color channel −
- Firstly, split the RGB image into individual color channels (red, green, and blue).
- This can be achieved by using the np.split() function from the NumPy library.
- Once the image is split, calculate the desired percentiles for each color channel using NumPy”s np.percentile() function.
- After obtaining the percentiles, use the stretch() function from Mahotas to each channel independently, using the calculated minimum and maximum values.
- This will stretch the pixel values within the desired percentile range for each channel.
Finally, merge the stretched channels back into an RGB image by concatenating them along the color channel axis. The resulting image will be the stretched RGB image based on the specified percentiles.
Example
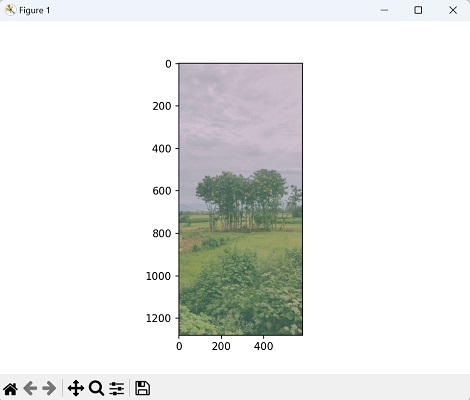
In here, we are trying to stretch an image with percentile value −
import mahotas as mh
import numpy as np
from pylab import imshow, show
image = mh.imread(''nature.jpeg'')
# Splitting the RGB image into individual channels
r, g, b = np.split(image, 3, axis=2)
# Calculating percentiles for each channel
r_min, r_max = np.percentile(r, [17, 90])
g_min, g_max = np.percentile(g, [25, 75])
b_min, b_max = np.percentile(b, [50, 99])
# Stretching each channel independently
stretched_r = mh.stretch(r, r_min, r_max)
stretched_g = mh.stretch(g, g_min, g_max)
stretched_b = mh.stretch(b, b_min, b_max)
# Merging the stretched channels back into an RGB image
stretched_image = np.concatenate((stretched_r, stretched_g, stretched_b),
axis=2)
imshow(stretched_image)
show()
Output
After executing the above code, we get the following output −
